The Seven First Essential 4×4 Mods for Australia Travel
So you want to travel around Australia in a 4×4 like we do? Well, you probably should make a few essential upgrades to your vanilla Hilux (or Ranger, or BT-50, or whatever).
The problem is, if you walk into any 4×4 store — ARB, Ironman, TJM or the like — you’ll be bombarded with 4×4 mods that you’re told are essential for offroad travel.
This is the really hard part for us. Travelling by 4×4 is a luxury for most people — something to do for recreation. So people are less conscious about costs and tend to buy everything and the kitchen sink (literally… although we already have a kitchen sink!)
We, on the other hand, are cost-conscious. We want to recoup most of what we invest in our Hilux when we sell it (and we think it’s possible!)
So it’s really hard to figure out what 4×4 mods you actually need to travel around Australia and why. Do you need those giant spotlights? An epic bullbar? Suspension upgrades (and which one)?
To start with, make sure you have the right base vehicle. It’s really easy to buy the wrong one — we know, we did! We later upgraded to a 2013 Hilux KUN26R and couldn’t be happier. It’s a workhorse.
Here’s our guide to getting the right 4×4 vehicle to get you started, by the way.
And below are what we think are the most important 4×4 mods that we decided we absolutely have to have at a minimum — and what we’d recommend for most people. You can add more — but start with these.
We’ll also have a section on things you may not actually need — make sure you go have a look.
(By the way, we’re learning by doing here. Is there something we’ve missed? We spend a lot of time talking to people and researching, but if there’s something you think we should add to our list of essential 4×4 mods — please tell us. We love hearing from people.)
Contents
Essential 4×4 Mods for Australia Travel — List and Budget
Here’s a table of 4×4 mods plus what they’ll roughly cost, and how long they take to install.
I’ve included the labour time separately to the approximate cost, because mechanics vary in price. They’re usually around $100 an hour, but you might have a friend, or you might live in the middle of Sydney.
The labour time is what it would take a mechanic to do — someone who has done the job before. If it’s your first time with the job, it will probably take you longer as you’ll realise you’re missing a tool, or a bolt, or some part needs to be modified, or something. For me, if I see 1 hour, I know it’ll take me four total — plus time in between going and buying tools and parts.
Prices are in Australian Dollars, because this adventure is in Australia. The conversion to US dollars or Euros is typically in the order of 0.75x (obviously, check the exchange rate!)
| Mod | Approx. cost in AUD (before labour) | Labour time (hrs) | Difficulty |
|---|---|---|---|
| Steel bull bar | $1,500 | 4 | Medium |
| CB Radio | $300 | 2 | Easy |
| Lights | $300 | 2 | Easy |
| Dual battery | $600 | 2 | Medium |
| Snorkel | $750 | 2 | Hard |
| Solar | $500-1000 | Zero | Easy |
1. Steel bull bar
The very first thing you need is a heavy duty steel bull bar.
A bull bar is one of the most important 4×4 mods in Australia because of the amount of wildlife, particularly off-road. It’s easy to hit a kangaroo. And if you see a water buffalo, you’re in trouble!
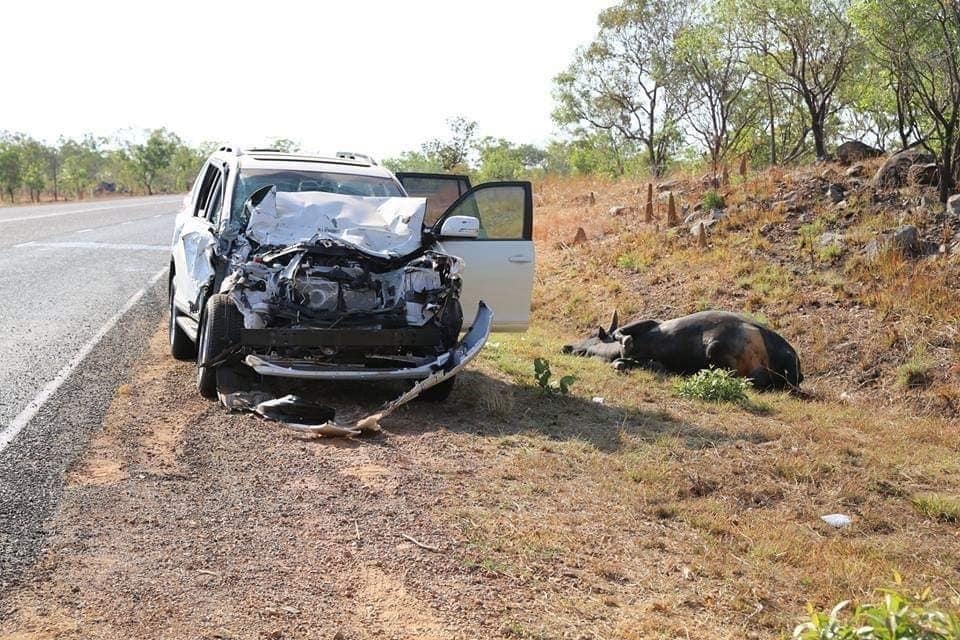
A travelling bull bar in Australia needs to be made of steel. Alloy isn’t enough (for more than one use), as isn’t plastic.
You can expect to pay about A$1,500 for a good steel bull bar, plus $4-500 for installation ($2,000 total) —unless you do it yourself. We got ours from OCAM.
I’ve seen cheaper bull bars (around $1,000), but they’ve had long lead times and are delivered in a week or two from an online store, and also seen $2,500 bull bars with bells and whistles that you probably don’t need unless this whole thing is a tax write-off!
You can technically install a bull bar yourself. But here’s where you’ll run into trouble
- They often don’t come with instructions. I don’t know why. It’s a nightmare. You just get a vague diagram and lots of bolts and nuts. I guarantee you’ll have leftovers!
- Sometimes you have to cut bits off the car — it depends on your car and the kit. This may include parts of the under panels, and maybe the body.
- You might have to drill some holes for it to mount properly.
I knew that an estimated 4 hour install time would be more like 4 days for me. So I gave it to a mechanic to do.
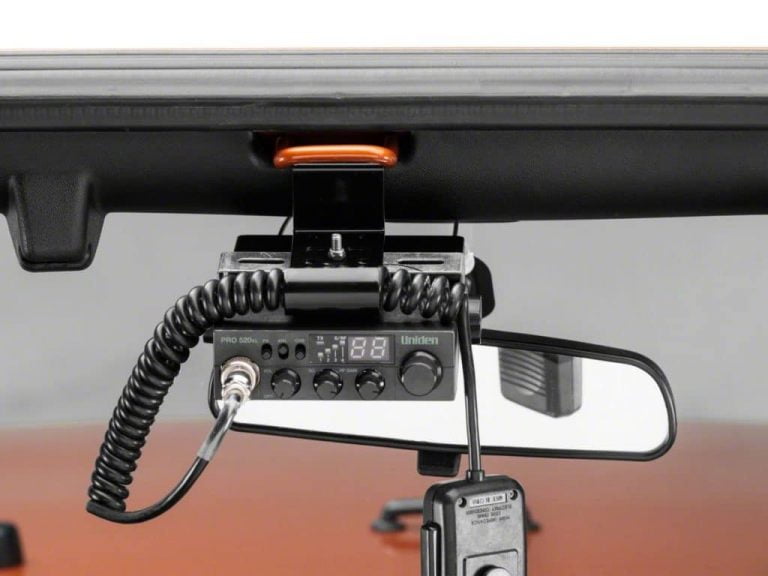
2. UHF (CB) radio (and antenna)
UHF antennas and radios are common 4×4 mods. But do you really need them? I didn’t think so until I did a bit of research.
You definitely don’t need an extremely fancy radio that can do multi-channel communication.
All you need to use are three channels on your CB radio, and one at a time is fine
- 10 – for 4WDers in parks
- 18 – for caravaners/campers
- 40 – for road safety
That’s it.
The reason you need a UHF radio is that in many remote parts of Australia there is no cellphone reception (just sat phone) and you may have an emergency. If you’ve broken down and it’s late at night and you’re out of supplies… you should have a way of contacting civilisation.
It’s tempting to just get a hand-held unit. But you’ll get much more range from a unit that’s mounted and has an external antenna. Expect to pay about $250-300.
Installation of a CB radio isn’t hard. The hardest part is hiding the wiring away and having a tidy installation — just put a bit of thought and planning into it.
By the way, if you’re wondering what to shop for, a UHF radio and a CB radio are the same thing. The acronym UHF means “Ultra High Frequency”, and is the name for a range of frequencies, similar to VHF (“Very”), which you might remember if you ever had to tune your own TV (something we had to do until the mid-nineties or so). The acronym CB stands for “Citizens Band”, and is part of the UHF band of frequencies that’s used for communication between regular people.
3. Lights (Spotlights, a light bar, etc.)
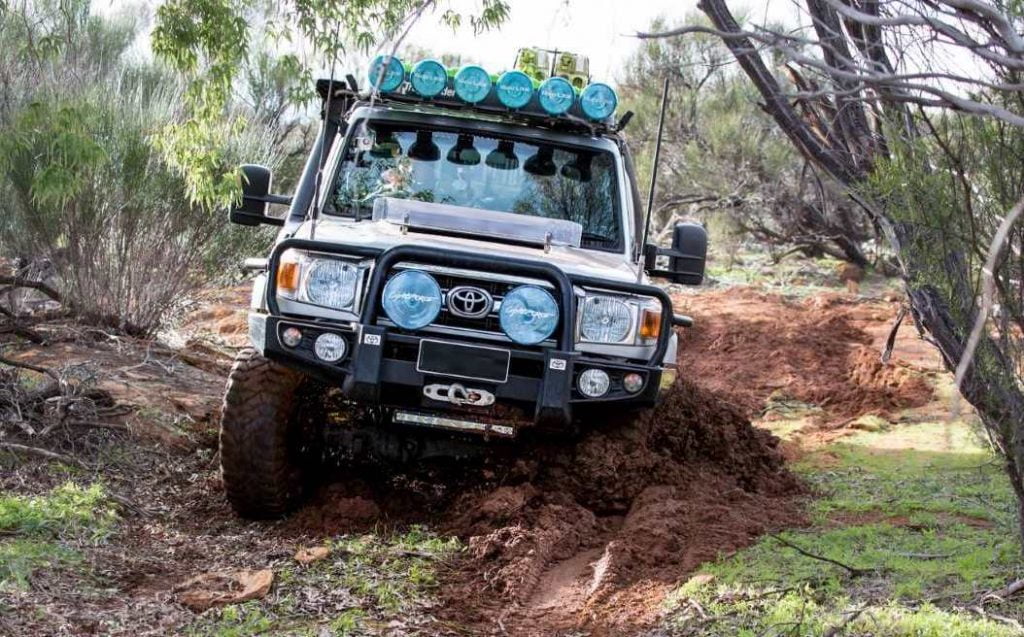
It gets really dark at night in the outback. There are many times when you’ll be alone. And in that case, your headlights just won’t seem like enough.
A light bar or spotlights are cheap, and wiring them up with a relay/fuses isn’t hard if you’re a little technically minded (and we can do an article on that if you need). Otherwise, expect to pay for about 2 hours of technician time.
Lights aren’t expensive. You can get a bright pair of LED spotlights for around $300, and about $500 installed, making it one of the cheapest and coolest 4×4 mods around. Your truck will look the bee’s knees!
4. Dual battery system
If you’re going to run accessories off your battery, then you should have a separate battery for accessories, so you never run down your starter battery.
And since many car batteries have relatively short shelf lives, having a second battery is good insurance for if your primary battery fails.
Expensive camper setups have a battery IN the camper — ideally a lithium battery which weighs 1/4 of the weight of a lead-acid or AGM battery, but which also costs 4-8x as much!
A battery in the camper is definitely the best way to isolate your power systems. However, wiring a camper for power is a fairly big investment — not one everyone wants to do.
For us, we added another lead acid battery under the bonnet, building a dual-battery set-up, and hook up a solar panel to it whenever we park.
You will pay about
- $250 for a second battery
- $200 for a battery tray
- $150 for a DC isolator (or $500 for a DC-DC charger)
- ~$100 for wires, fuses, etc.
- $200-1,000 for a solar charging panel setup
And again, expect to pay for about 2 hours of technician time to install it (1 hour if they’re generous), and for a few things like lugs and wires.
While there are many ways of building a good DC system, a dual battery setup is a good idea just because it can also serve the purpose of being a backup starter battery if everything goes pear-shaped.
5. Snorkel
“Pfft.” we thought. “We don’t need a snorkel; it’s not like we’re going to do any river crossings.”
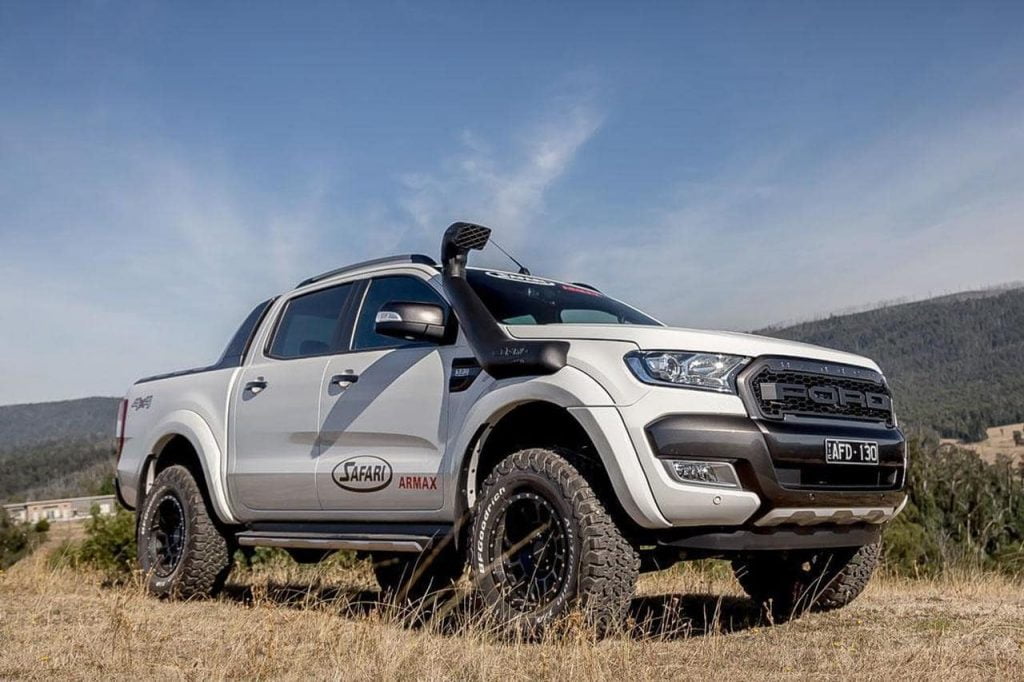
When talking to a 4×4 builder, they often cite a snorkel as critical on a list of 4×4 mods. At first, I thought it was just because every 4×4 I see in Australia has a snorkel and they look cool. In fact, many tradies have a snorkel fitted and I never understood why.
But a snorkel isn’t just for crossing the river (or looking cool), it turns out. A snorkel is also to avoid overloading your air filter with dust.
See, most of Australia is very dusty. And when that dust is kicked up by the wheel into the wheel well which is where the air filter collects air, then you’re basically just sending red dust right into the air filter!
Snorkels are a little pricey — you can expect to pay about $750, plus about 2 hours installation time. Most of that is cutting a hole and making it look good, and sealing up other air intake parts.
Take care of your snorkel and ensure the seals stay in good shape.
6. Upgraded suspension (And maybe A GVM upgrade)
This is a big one. We spent $3,500 for our GVM upgrade, and it’s easy to spend $5,000. But upgrading suspension is one of the most important 4×4 mods you can invest in.
In short, you want to upgrade your suspension to
- Ensure ride quality when carrying a heavy load
- Meet legal requirements for the maximum load your car can carry
A suspension upgrade is often intermingled with a “GVM upgrade”. But they’re not necessarily the same thing. You can improve your suspension, but unless you get engineering certificates and go to the transport department and submit paperwork, you won’t have a GVM upgrade.
GVM is “Gross Vehicle Mass”, and is the legal limit that your totally laden vehicle — all fluids, passengers, and gear — is allowed to weigh. This is a whole other topic — I found it unnecessarily complicated, so will try to simplify it — but in essence:
- Our ute with no people and no fuel weighs ~1600kg. It’s a 2011-2015 Toyota Hilux, so rated for a maximum of 2,850 kg GVM.
- With two medium-sized people, full fuel, a camper (dry), bull bar, and lights, our vehicle weighs 2600kg
- That leaves 250kg for food, water, spare fluids, tools, clothes, camping equipment, cookwear, and everything else.
So with a slide-on camper setup, it’s easy to go over the rated vehicle GVM. If you’re carrying a slide-on camper (like we are), you can expect to get the attention of police who will check to see if you have the required certification for your vehicle.
Even if you stay under the GVM, your suspension is probably straining with that load. So at very minimum, upgraded suspension (stronger springs and coils, plus up-rated shocks, and other components) is a good idea. The GVM certification is just if you go over the legal limit — and it’s good insurance, literally… if you’re over, your insurance isn’t valid!
Google your model and GVM upgrade and get a few quotes. But you can generally expect to spend $3,500-5,000 for a full kit installed, plus engineering and certification (a “blue plate”).
7. Solar
I’ve seen people go offroad without solar. They use generators, or turn their car on every couple of days. But why bother? Solar is one of the most practical, fun, and cool 4×4 mods around. Off-grid, baby!
Solar cells have come so far in the last few years — you can get an incredible solar panel for less than $500. And the absolute maximum you need to pay for a minimalist system is $1,000.
If you have a normal amount of accessories, you probably will draw about ~50Ah of power in a day. That’ll include (these are all rough numbers)
- Charging two phones once (5Ah)
- Charging one laptop once (10Ah)
- Running your 12V fridge for a day (35Ah)
- Other bits and bobs: 1-5Ah
The fridge uses the most power out of all of this. Most car batteries hold around 100 Ah. So this means you can do all that for two days before you run out of power from one car battery.
So you need to recharge your system with 50Ah of power a day. A 300W solar panel — which will cost you about $400 if you get a less portable one, or $1000 if you get a portable one that folds up — charges at 20A at PEAK (when the full sun is directly above it), at 2A towards the morning and evening, and at various figures in between. Basically, a 300W solar panel can — without moving it around to optimise it — provide well over 100Ah (a full battery charge) of energy. And this means when it’s overcast, or if you’re in shade, it’ll still provide enough energy to keep you alive.
You can get by with less — a 100-150W panel may suffice for many. You might have to ensure you’re in the sun, and do a bit of adjusting of the direction of the panel, though.
Solar systems get very complicated. But let me simplify it to the absolute minimum: All you need is a solar panel that comes with a built in “regulator”. You get the two prongs that come with it and hook it up to your battery. Match red up to red, and black up to black, and you’re in business.
Bonus: Reversing camera (if you don’t have one)
This isn’t on every vehicle’s list of 4×4 mods because if you have a late-model truck (around 2015 or later), then you may have a built-in reversing camera if it was optioned at the factory.
But otherwise, I would suggest getting a wireless UHF camera from somewhere like Jaycar ($220) and installing it. If you don’t mind a few more wires, get a wired version for as little as $60 from Kogan.
I did the installation myself, and anyone can. Most of that time was figuring out how to wire the power to the screen without leaving wires everywhere.
Things you may not need
You can make an excuse to buy anything. But you don’t have to buy everything.
A few examples of 4×4 mods you don’t have to buy are
- The biggest wheels and tyres possible. Sure, they look badass. But they won’t be necessarily better at carrying your load. If you get really aggressive knobby tyres that are huge, it can actually become an inconvenience — they’ll be noisy on the highway, throw off your speedometer, and may actually be an illegal ride height modification.
- A suspension lift. If you know you need this because you’re going to go over huge boulders, then you know you need them. But if you’re not sure, and you are considering raised suspension just because it looks cool, then you might not need it. At most, you might need a GVM upgrade; most people do need a suspension upgrade, but it doesn’t have to come with a lift.
- Generator. It’s tempting to think “argh, I must be able to power all my appliances!” But you can get easily enough mileage out of an auxiliary battery and solar panel. A generator is big and heavy — not buying one will save you weight and money.
- Auxiliary fuel tank. Again, you will need this if you’ll cross the desert. But even fully laden, your average ute will easily take you 400kms, and usually more. Even in really remote parts of the country, it’s unusual to go more than 100 kms without an opportunity to fill up.
Those things are cool. And there are things I haven’t even mentioned, like long-rage water storage tanks, interior lighting, tools, fluids and so on.
But costs, weight, and time add up. Hopefully the above gets you started.

![[Sold] Our Toyota Hilux 4x4 + Trayon Camper For Sale 4 [Sold] Our Toyota Hilux 4×4 + Trayon Camper For Sale](https://discoverdiscomfort.com/wp-content/uploads/2020/12/Toyota-Hilux-4x4-camper-set-up-next-to-river-header-768x576.jpg)
